Jump to a topic
Basics of Time-lapse
Definition
Time-lapse: Denoting the photographic technique of taking a sequence of frames at set intervals to record changes that take place slowly over time. When the frames are shown at normal speed, or in quick succession, the action seems much faster.
So, what exactly does this mean and how do we achieve this Time-lapse effect? You'll need a camera and a subject that changes over time, like a sunset or flowers. Then simply need to take photos at a different interval then the interval at which you will play them back.
Example
Take a total of 100 photos, taking one photo every 10 seconds:
100 photos × 10 seconds = 1000 seconds.
Make a movie playing at 25 frame per second (fps) from these photos,
the movie will be 4 seconds long:
100 photos / 25 frames per second = 4 seconds.
This movie will speed up time by a factor of 250:
1000 seconds / 4 seconds = 250×.
If a flower normally takes about half an hour (2000 seconds) to open, you can
show that flower opening with a movie 8 seconds long if you take one photo every
10 seconds and play it back at 25 frames per second
2000 seconds / 250 = 8 seconds
Using this basic knowledge, you can take the photos at a shorter or longer interval and play them back faster or slower to achieve different effects, it is advised to choose the playback speed in such a way that the motion of the movie is smooth, not to fast nor to slow. You can make a time-lapse movie from just about anything, just let your imagination take control.
To get a better idea of what time-lapse is; view my Time-lapse Movies.
Requirements
Recording - the camera
For this you can use a digital or analog device. Digital is preferable as that will make the following steps much easier. The device can be a still camera, video camera, smartphone, webcam, or something equivalent.
A very important requirement is that you can control the interval at which the device takes pictures (see Trigger, below). It also needs to have enough storage to be able to hold all the pictures that you want for your time-lapse, they can either be stored on the camera or another device, like a connected computer. The camera needs a good battery, or connected to an AC adapter to give it continuous power.
Trigger - an intervalometer
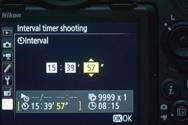
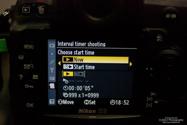
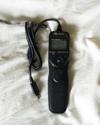
Some cameras have built-in functionality to make a time-lapse. Sometimes such a feature is called an 'intervalometer'. If your camera doesn't support interval shooting on its own; use an external device to trigger it. This can be a computer or an intervalometer to trigger the camera. See the topic 'Taking the pictures' for a list of useful software and possible intervalometers. A computer needs to be connected to the camera via a cable or wirelessly, a cable is probably more reliable and less of a power drain.
Stability - a tripod
A tripod is very important when making a time-lapse movie. It will ensure that all pictures are aligned correctly. It can be useful to weigh down your tripod with extra weight to lower the center of gravity and increase stability. Alternatively, a clamp can be used to attach the camera to something stationary.
Simply laying the camera on a flat and steady surface can suffice, but make certain that it is stable and won't slide away.
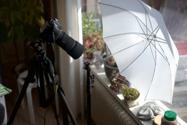 Camera and umbrella tripods
 On a tripod
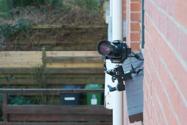 Clamped to windowsill
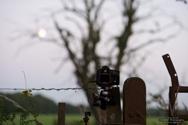 Clamped to fence
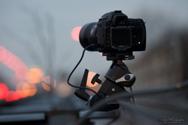 Clamped to guardrail
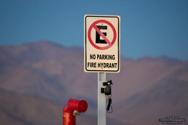 Clamped to sign
 Clamped to rail
Composition - a subject
Of course you also need something to make the pictures of, preferably something that moves. Try to predict how the subject will move over time to make certain that your camera covers the correct angle and uses the correct interval to show the motion.
Example subjects:
Moving clouds, blooming or withering flowers, melting ice, clockwork, people, animals,
traffic, sunrise, sunset, or stars.
Taking the pictures
Some cameras have a built-in intervalometer which allow you to take time-lapse photos without an external device. If your camera doesnt have this option (or if are using a webcam) you need a computer with the right software or an intervalometer to take control over the camera.
Depending on your software/hardware/subject you must select an interval (e.g. 5 seconds) between each photo and the total amount (e.g. 500) of photos to be made. Then initiate the shooting and wait while your photos are being taken. Then transfer them to your computer (if you where using the computer to make the photos, the photos most likely will already be transferred to the computer). After this you can make a movie out of them.
Power
If you do use a battery, make sure that it is fully charged. If you intend to make a long time-lapse or if you are shooting via the computer I suggest you use an AC adapter for the camera: to keep it powered for an unlimited time. I almost always use an AC adapter when shooting time-lapse, it is more reliable then a battery. Moreover, some AC adapters allow the battery to remain in the camera so it will act as backup should the power fail.
Storage
Check that you have enough space left on your memory card to fit all the images that you want to take. If you don't have enough storage you might consider setting your camera to a lower quality setting (not recommended). Or just buy a larger memory card, since memory cards are fairly cheap these days you can easily buy an 32GB+ memory card which can hold many photos. I recommend shooting in the highest quality possible (RAW). This gives you the most flexibility when you process the images.
Exposure mode
Usually you should put your camera in Manual mode (a fixed aperture and exposure time), because that will prevent a lot of flickering in the resulting movie. Make sure that you take some test shots before starting the time-lapse to make sure the exposure is set correctly.
When lighting conditions are very inconsistent, it may be better to let the camera determine the shutter speed, you should then use Aperture priority mode (fixed aperture) to prevent changing of Depth of Field, while letting the camera decide the appropriate exposure. If there is still flickering in your movie, see the Advanced section on ways of fixing this.
You should not use Auto White balance, set the camera to a specific white balance preset to keep it constant throughout the movie. This is especially important if you shoot JPG, since that makes it more difficult to adjust it later.
Manual focus
If your camera supports manual focus and your subject will remain at approximately the same distance; use manual focus. If you use auto focus your camera might fail to focus correctly on some shots, which does not look pretty in the final movie. Using manual focus will also increase your camera's battery life.
Computer controlled
When using a computer to control your camera make sure that the camera's USB mode is correctly set. Most cameras can be set to either 'Mass Storage' or 'PTP' (or 'MTP'), to control it via a computer the camera has to be set to PTP (or MTP) mode.
Intervalometers
Some cameras (and smartphones) have a built-in intervalometer or time-lapse option which allow you to take time-lapse photos without an external device. If your camera doesnt have this option there is software and hardware available to control cameras for time-lapse shooting, here are some examples:
How to make movies out of pictures
Once you have made the photos for your time-lapse movie you will want to make a movie out of them, here are some tips to help you do that.
Tip; Remove the first and last frame
If you have to press a button on your camera to start the time-lapse shooting I
suggest you do this:
When you press a button on your camera to initiate the
time-lapse, you are moving the camera a little bit. This causes the first photo to
be a bit off center when compared to the other photos. Therefore I suggest you remove
the first photo before you make the movie.
Sometimes stopping the time-lapse recording also requires turning the camera off, so also check the last frame.
Software
There is a lot of software that can help you to make a movie from your images. Some are free, some are not, some are better then others, some offer more options then others. I suggest you take a look at all of them and see which best fits with your needs.
| Software | macOS | Windows | Linux | Free? |
|---|---|---|---|---|
| time-lapse Python package | ||||
| Adobe Video Software | ||||
| Final Cut Pro X | ||||
| Media Composer First | ||||
| Avidemux | ||||
| FFmpeg | ||||
| LrTimelapse | ||||
| Panolapse |
Exporting the movie
On this website the movies are created from the photos using FFmpeg. This is steered from Python using ffmpeg-python and my own time-lapse package to manage that. Scripts describing the creation of the individual movies are stored here: Time-lapse scripts.
Preventing flicker
If you have made your time-lapse movie on a cloudy day or if the scene is lit by a lightbulb, the lighting conditions may have changed during the shoot. This might cause flickering in your movie, brightness differences between consecutive frames. A lightbulb can cause flickering because of the way AC power outlets works, namely at 50-60Hz. This causes slight fluctuations in the brightness of the bulb, our eyes usually don't see this because they work at ~25Hz. Therefore you will need to set your camera shutter speed slower than 1/25th of a second, preferably slower to make sure that one exposure encompasses multiple periods of fluctuations of your lightbulb, thus evening out the light changes.
Another cause of flicker in time-lapse is 'Aperture-flicker'. This refers to the effect that the aperture of the lens does not close precisely the same amount for every photo. This means that slightly more or slightly less light will enter the camera, while the shutter speed remains the same. Here is a video that shows how the aperture blades move during the taking of a photo. There are several ways to avoid this potential problem, you can for instance shoot 'wide-open' (lowest f-stop), because then the aperture does not move at all. There are also ways to fix the aperture of a lens to a certain setting on a DSLR, by partly loosening the lens from the camera body in a particular way, but that is more complicated.
Removing flicker
Luckily there is software out there that can help in post-processing to reduce flicker. FFmpeg includes a deflicker-filter, this is used by my time-lapse package. For Adobe Lightroom, a plug-in can be used: LrTimelapse. Many other tools also include a deflickering option.
Ramping Exposure
This is an extremely useful technique for sunset or sunrise time-lapses, since during such an event the proper exposure for the scene changes dramatically. If you dont change the exposure of the camera accordingly, the photos will either turn black or white really fast. Ramping (changing over time) the exposure counters this by changing the exposure such to compensate for the changing light levels. When done properly it can also prevent flickering.
One method of ramping is often referred to as Bulb ramping. Devices exist which control the camera exposure time during a time-lapse. This requires you to turn your shutter speed to bulb mode, then the device will control the exposure time (and the intervals) of the camera, which can be programmed to change over time.
Other methods are to slowly change the aperture of the lens or the ISO in the camera, or even to use combinations of changing the aperture, shutter speed, and ISO.
Motion
There are several ways to get (camera) motion in a time-lapse movie. First of you you can let your camera move slowly while you are shooting. Secondly you can add motion to the movie after you have shot it, by using video editing software.
Motion during shoot
You can use a Dynamic Perception setup combined with the Open Moco software to add pan and tilt to your time-lapse movies. The software and tools are designed specifically for motion in time-lapse, being able to move very slowly and create natural looking motion (ease-in and out).
Motion in post
Another option is to use software like Adobe After Effects to create a fake motion. You can add two keyframes to your movie in After Effects, one where the motion starts and one where it should end. Each with a different position/scale for the movie, the program will then automatically create the motion (with ease-in and out if you want) to go from one situation to the other, thus simulating motion.
